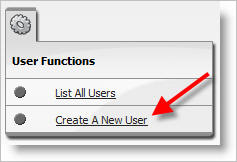
Create a New User
It is easy to grant another person access to the system. Only those users who have access to the "Users" tab can do so.
Here's how:
1) Click on the Users Tab

2) Click on the Create A New User link

3) Fill out the form.
When creating a new user, it is a good practice to choose a meaningful User ID rather than a generic one like “Admin1”, “Admin2”, etc. You might use the same convention as your email. For example, if your email addresses are in the format of asmith@district.net (for Alex Smith) then a good user ID within AppliTrack would be “asmith.” For the password you could use the user’s extension or other piece of little known info like the last four digits of their SSN. Then, when the user logs on the first time he/she can change the password to a personal one that is preferred and will be more likely remembered by clicking the Setup tab.

4) Select one of the following "User Types":
Most users (principals, etc) are Standard Users with no additional permissions.
Most HR staff are SuperUsers. This means they can access all system functions.
Hiring Supervisors who can only view pre-authorized groups of applicants (for example, the Transportation supervisor) are Routings Only. Note: see the help topic "Create a Routings Only User" for more information.
Select users have the "Can Control Users" permission. This means they can view and create other users. Typically, only 2-5 users in the district Can Control Users. IF YOU ARE CREATING USERS FOR THE FIRST TIME, CREATE A USER FOR YOURSELF WITH THIS PERMISSION "ON."
5) Be sure to click "Save" to save your changes.